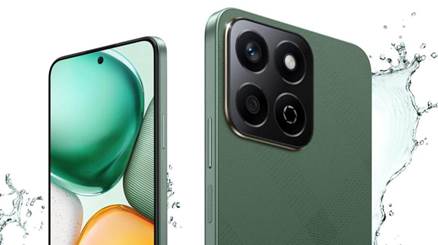
Smartphones
today, like the HONOR X7c, come packed with powerful features that allow you to make the most out
of every dim scenario. With the right settings and techniques, your photos will
stand out, offering depth and detail. In this guide, we’ll explore key
practices that elevate your low-light photography skills. By adjusting specific
camera settings and applying thoughtful strategies, you can transform ordinary
nightscapes into stunning visual memories. So, whether it’s a vibrant cityscape
or a tranquil moonlit scene, your smartphone will be your perfect companion in
capturing each moment brilliantly.

Essential Settings to Optimize for Low-Light Photography
Unlock
the full potential of your smartphone camera with essential settings tailored
for low-light conditions.
Adjusting ISO for Better Exposure
ISO
is your smartphone camera’s sensitivity to light, and adjusting it is vital in
low-light environments. A higher ISO allows you to capture more light, thus
making it suitable when darkness prevails. However, increasing ISO too much can
introduce noise, creating grainy photos. For smartphones, aim for a balanced
ISO setting where enough light is captured without sacrificing clarity. Many
smartphone cameras automatically adjust ISO based on lighting conditions, but
using a dedicated manual control will give you greater mastery. As you adjust
ISO, take a few test shots to see how different settings influence the scene.
It may require experimenting to discover the optimal ISO for each environment
you photograph.
Using Manual Focus and Exposure Control
Manual
focus is a powerful tool in low-light photography. By manually refining focus,
you can sharpen subject details that might otherwise get lost. Low-light
conditions tend to confuse autofocus systems, often resulting in blurred
images. Switch to manual focus to gain precision control over what elements
remain sharp. Using exposure control, you similarly dictate how much light
enters the camera lens. Lock the exposure settings if your camera supports it,
allowing you to achieve consistent lighting in your shots. Most smartphone
cameras offer a simple interface to adjust these manually, enabling
photographers to overcome the challenges posed by low light while retaining
detail.
Choosing the Right Camera Mode
Selecting
the appropriate camera mode is vital for low-light success. Many smartphones
come with dedicated night or low-light modes that automatically adjust settings
like exposure and shutter speed. These modes help capture images better adapted
to the minimal lighting available. Alternatively, the Pro mode allows
experienced users to tweak individual settings for personalized results. In Pro
mode, you have the control to adjust vital parameters such as exposure, ISO,
and white balance to your preference. Understanding and utilizing these camera
modes enables you to optimize your
camera’s performance in poorly-lit environments, ensuring your photos are both
creative and sharp.
Tips for Capturing Stunning Low-Light Photos
Enhance
your smartphone’s low-light photography with invaluable tips.

Use a Tripod or Stabilize Your Phone
Stability
is paramount in low-light photography. Even the slightest shake can lead to
blurry images. Use a tripod for your smartphone to ensure steadiness. There are
many compact and affordable phone tripods available today that support
stabilization for crisp images. If a tripod isn’t accessible, improvise by
placing your phone on a steady surface or bracing it against a wall. Utilize
your phone’s timer feature to avoid hand-induced shakes during the shot. As you
secure your phone, focus on framing your scene beautifully, knowing your camera
is balanced and ready to capture sharp, detailed images even at lower shutter
speeds.
Take Advantage of Night Mode and Pro Mode
Modern
smartphones come equipped with night mode—a tailored setting for low-light
conditions. This mode automatically adjusts ISO and exposure for better
brightness and detail. With night mode, intricate details become more vivid
without overpowering noise. Explore pro mode for enhanced manual control. Here,
you adjust ISO, shutter speed, and focus to your liking. Experiment within the
modes to find a unique balance that showcases your scene effectively. Using
these smart camera innovations allows for creativity and personalization in
low-light settings, ensuring that you capture the essence of your subjects
fully and clearly.
Experiment with Long Exposure Shots
Long
exposure is an exciting technique that allows for creative exploration in
low-light photography. By prolonging the camera’s exposure time, more light and
motion are captured, producing stunning effects like blurred backgrounds or
trailing lights. Your smartphone camera, especially in manual or pro mode,
often supports adjusting the shutter speed for such effects. Consider scenes
with moving elements, such as traffic or flowing water, to showcase dynamic
visuals. Secure the phone using a tripod, reducing stability concerns during
the longer shot frame. As you engage with long exposure, monitor the scene to
prevent any unwanted overbrightness that could detract from the image’s
quality.
The Importance of White Balance
White
balance is crucial in achieving the accurate color temperature of your photos.
In low-light settings, artificial lights can cast unflattering tones over
images. Adjust white balance settings to ensure that colors appear natural.
Most camera apps allow you to select presets like “incandescent” or
“fluorescent” to match your environment. Alternatively, you can manually tweak
the settings for subtle corrections. Consistently adjusting white balance helps
maintain uniformity throughout your photo collection, making each image
visually pleasing. Practice with different settings to find what works best for
specific scenarios, adding depth and realism to your photos effortlessly.
Common Mistakes to Avoid in Low-Light Photography
To
improve your low-light photography, avoid common mistakes like overexposure,
grainy photos, and poor angles. Overexposure can wash out details, while high
ISO settings introduce grain. Use a low ISO and adjust exposure through
aperture and shutter speed. Always check your camera’s exposure settings and
lock them when necessary. Additionally, avoid shooting directly into a light
source; instead, experiment with angles to enhance lighting effects. A
well-chosen angle, combined with good composition, can elevate your photos and
bring out their true potential, ensuring crisp and captivating images even in
low light.
Conclusion
Low-light
photography need not be daunting with the right strategies in place. By
harnessing your smartphone’s settings and embracing essential techniques,
stunning night visuals become within your grasp. A steady hand, the right mode,
and thoughtful adjustments in ISO, focus, and white balance contribute to
achieving the ideal picture setting. Avoiding common mistakes like overexposure
ensures your photos remain striking and shareable. Experimentation is key—each shot offers ideas for
improvement and innovation. So grab your smartphone, explore the magic of
night, and let your creativity illuminate the darkness, producing images that
captivate and inspire.


